
Steps in 3PDF
Prepare the report’s photos
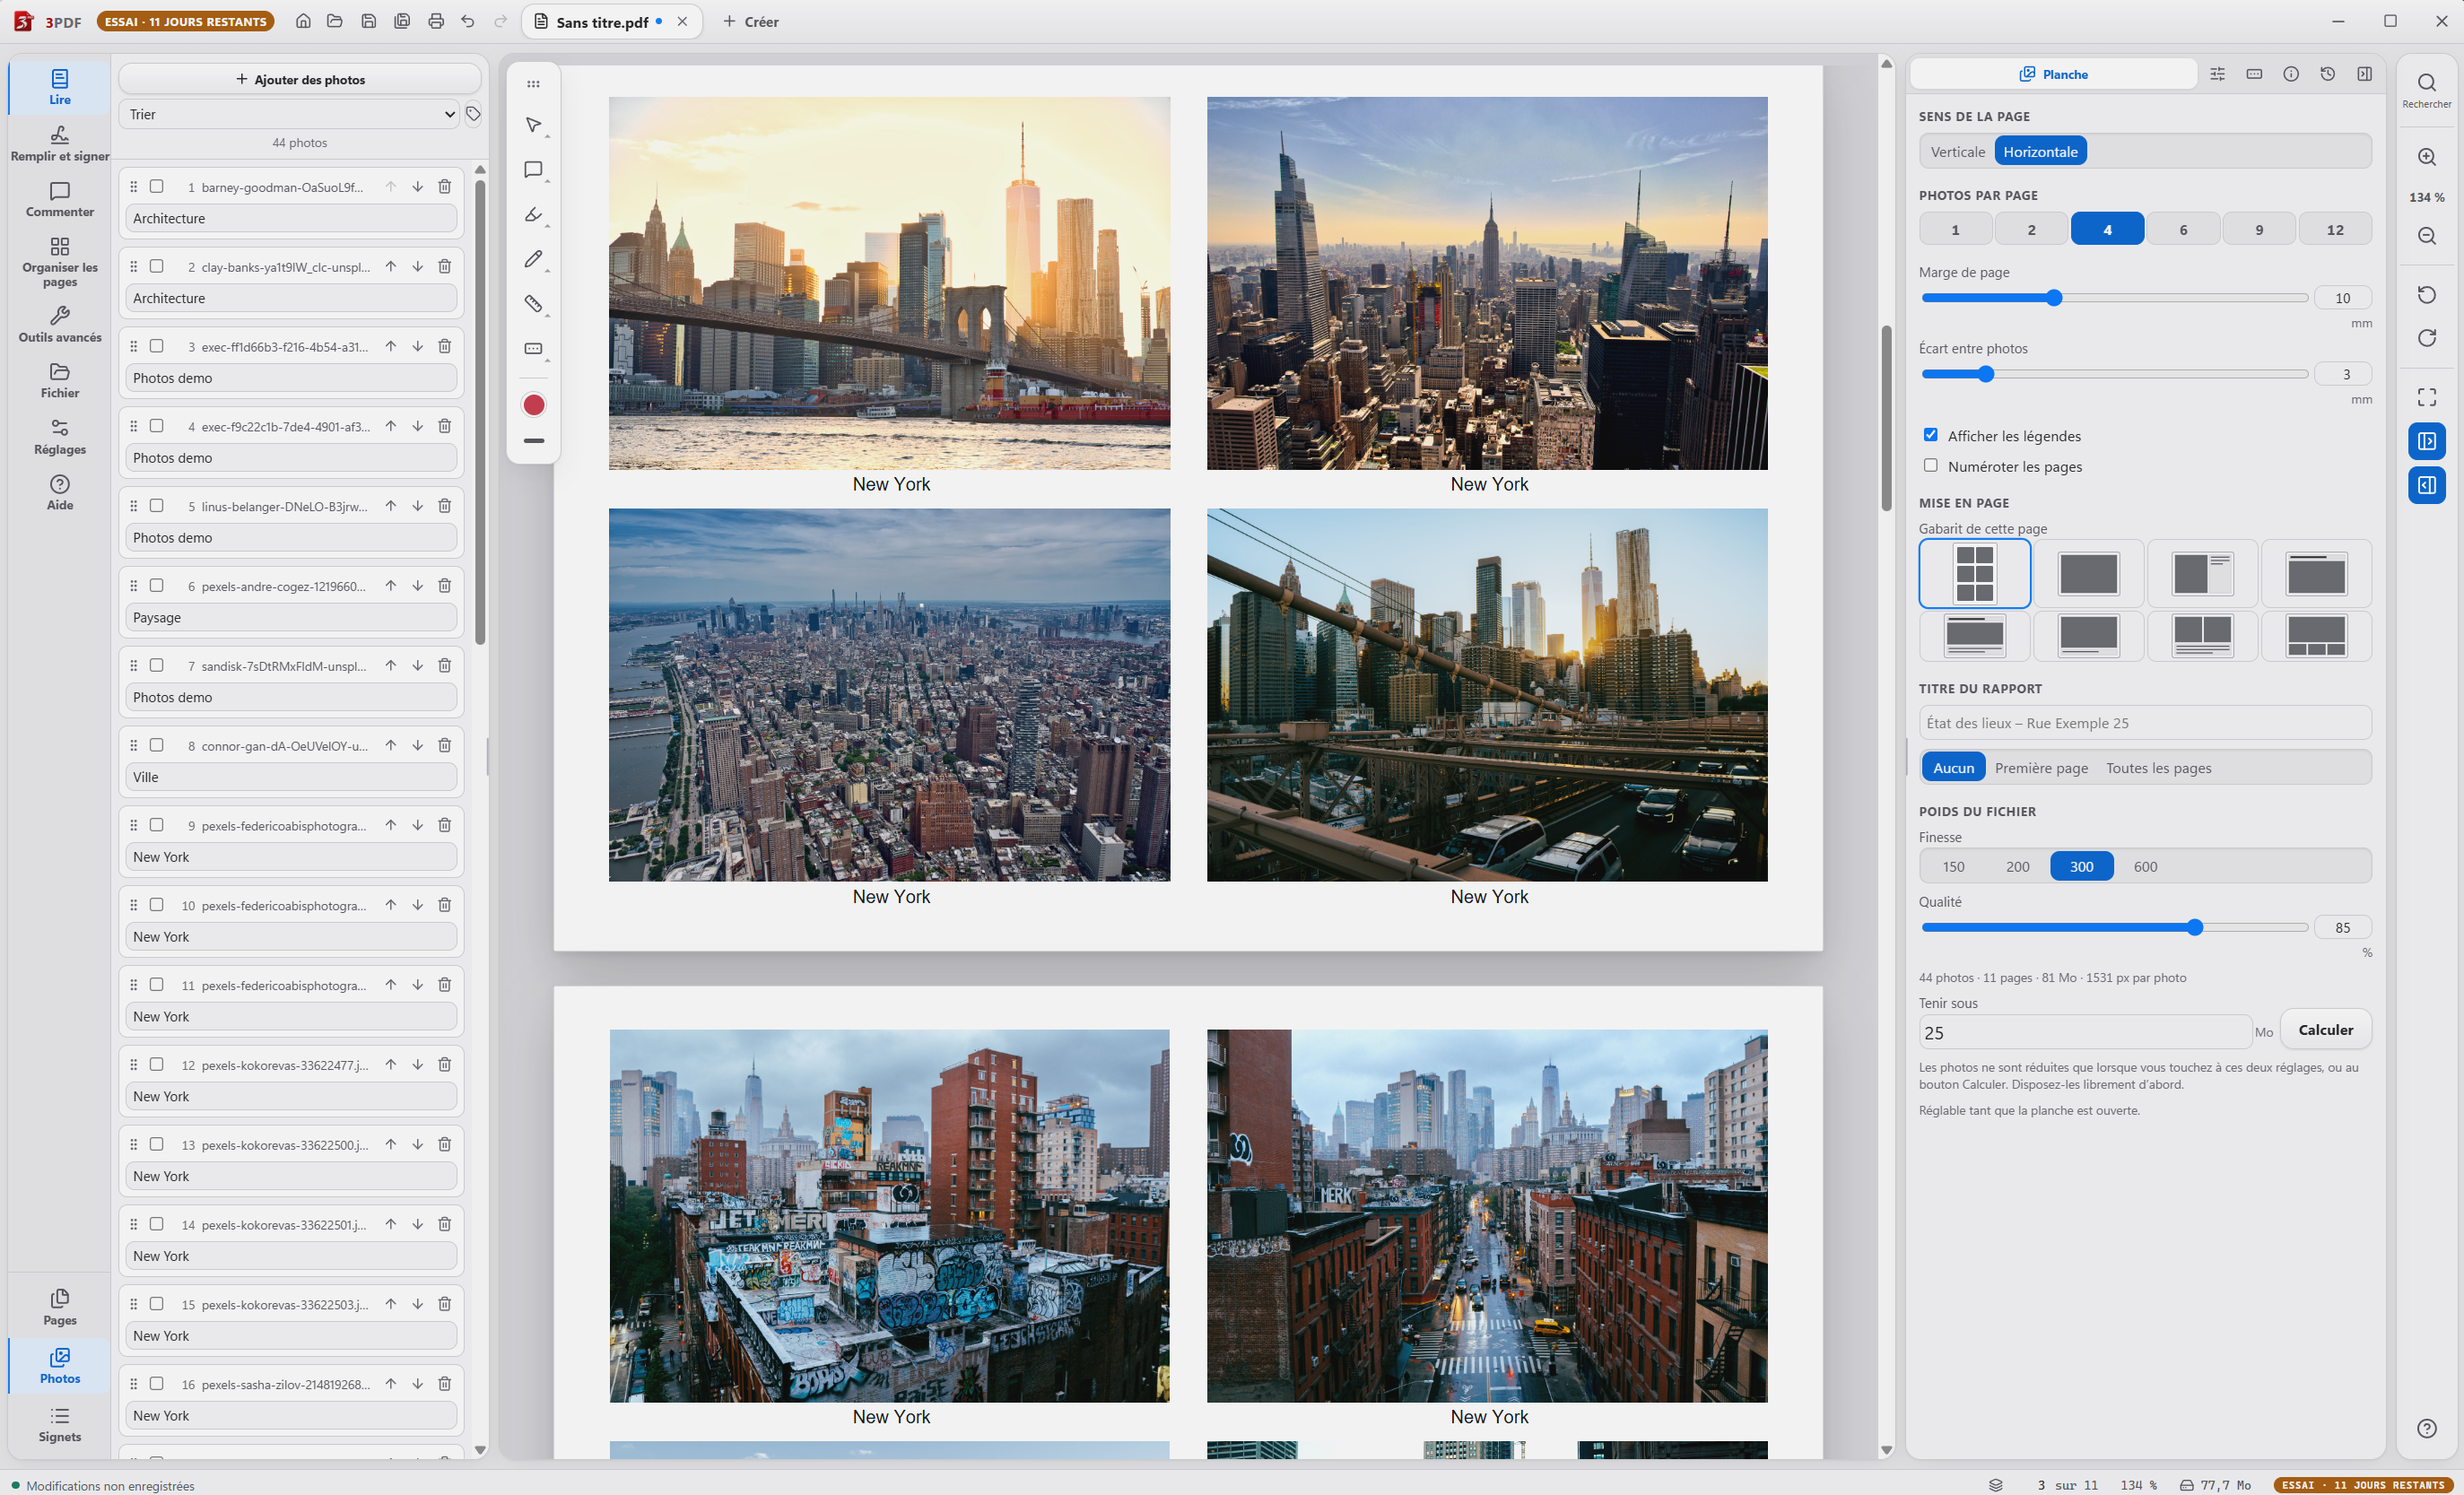
Collect the useful images in a folder and remove duplicates. Add your photos using 3PDF’s photo sheet creation tool. Check their order so the report follows your visit or the subjects you want to present.
Set the layout
Choose portrait or landscape and the number of photos per page. Adjust page margins and spacing between images. Caption and page numbering options help readers identify photos and find their place in the report.
Check file size and save
Adjust resolution and quality for the intended use. The target file size setting and calculation button help you work on document size. Check that important details remain legible before saving the PDF in your chosen folder.
The result and what to check
Putting more photos on each page makes them smaller in print. To show a defect or a fine detail, use a less dense layout. The related French-language video demonstrates the controls in the actual application.
How many photos should I put on a page?
Available choices range from 1 to 12 photos per page. Choose according to the details readers need to see and how the report will be shared. Inspect the PDF at its intended viewing size before settling on a layout.
This feature is part of 3PDF Pro
The reader is free, with no account. Pro tools cost €3.99 / month, for two computers per account. PDF processing stays local; your account, payment and access renewal use the Internet.
You can subscribe during your trial. The paid monthly period starts at payment. Cancellation takes effect at the end of the period already paid for.